[ad_1]
Despite being one of the best browsers worldwide, Google Chrome still has a lot of bugs its users face now and then. The majority of internet users prefer using Chrome to browse the internet. Some of them also prefer using Facebook on the browser instead of the app. But recently, many users have been complaining about Facebook not working on Chrome. If you are also facing this, keep reading to know how to fix it.
It could be frustrating if Facebook suddenly stops working on your browser. Usually, this happens due to the browser cache data or third-party extensions interfering with Chrome resources. However, there are other reasons to cause this issue. In this post, we have compiled a list of some troubleshooting methods that may help you fix Facebook not opening on the chrome browser.
Fix Facebook Not Working on Chrome Browser
Below is a list of some workarounds that may help you fix Facebook not working on Chrome
Restart Google Chrome
If Facebook doesn’t open on Google Chrome even after trying multiple times, restart your browser. It’s possible that Chrome was unable to access some files in the current session, and it was making Chrome misbehave. Restart the Chrome browser and check if the issue is fixed.
Clear Chrome Cache Data and Browsing History
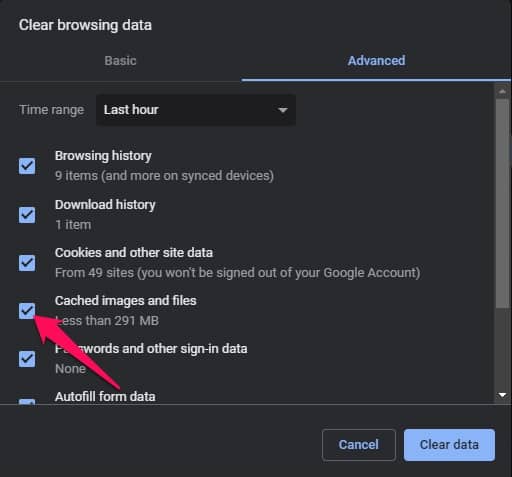
Corrupted cache and browsing data can cause Facebook not to work on Chrome. Delete your browser’s cache and browsing data as it won’t affect your browser in any shape. Here is how you can clear cache and browsing data on Google Chrome:
- Open Chrome browser and click on three dots at the top right corner.
- Go to Settings > Security and Privacy.
- Click on Clear browsing data.
- Navigate to the Advanced tab and click on Clear Data.
Change DNS Settings
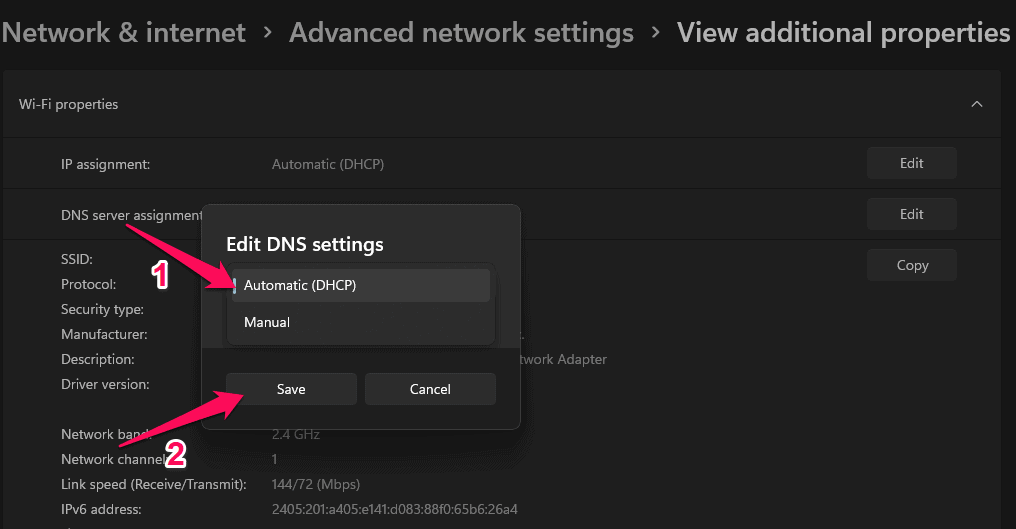
DNS or Domain System Name is the list of records accessed from the ISP when required. A slide alteration in DNS settings could lead to multiple errors on the Chrome browser. Where is how you can change the DNS settings:
- Press Windows key + I to open Settings.
- Navigate to the Network & Internet tab and click on Advanced Network Settings.
- Select the network you are currently connected with.
- Click on View Additional Properties.
- Click on Edit beside DNS server assignment.
- Change the DNS to Automatic (DHCP) and click on Save.
- Once done, restart the Chrome browser and check if Facebook opens.
Disable or Uninstall Extensions
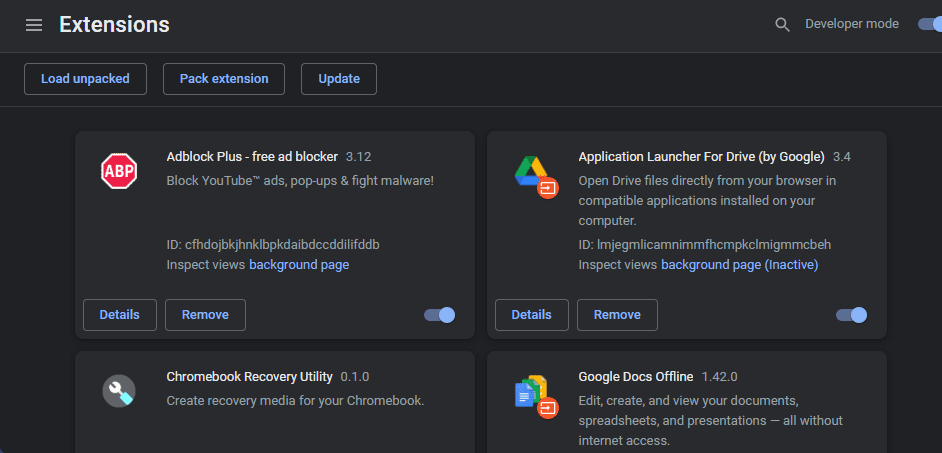
Chrome Extensions aim to enhance our web browsing experience and tasks. However, sometimes some extensions could interfere with the functioning of Chrome. To ensure an extension isn’t causing this issue, disable all extensions one by one and check a Facebook starts working. If Facebook starts working after disabling a particular extension, uninstall the extension. Here is how you can do it:
- Click on the Extensions icon in the Chrome browser.
- Click on Manage extensions.
- Switch off the toggle under each extension to disable it.
- To uninstall an extension, click on the Remove option.
Sync System Date and Time
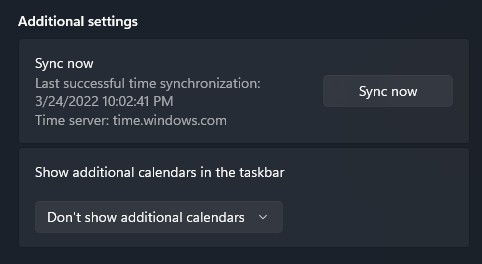
If your system’s date and time are not synchronized, you can face this error. Here is how you can check and fix it:
- Click on Start and open Settings.
- Navigate to Time & Language.
- Scroll down and click on Sync now under Additional settings.
Reset Chrome
If none of the above-mentioned steps could fix this issue, reset your browser to its default settings. Here is how you can do it:
- Open Google Chrome and click on the three vertical dots menu at the top right corner.
- Click on Settings.
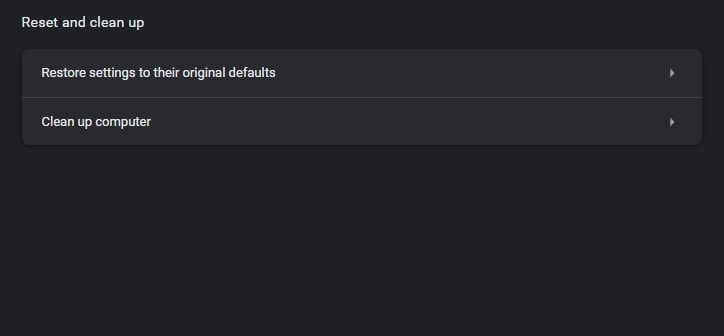
- Now Navigate to Advanced > Reset and clean up.
- Now click on Restore settings to their original defaults and follow the on-screen instructions.
Conclusion
This was all about how to fix Facebook not opening or working on Chrome. We hope that the troubleshooting methods mentioned above variable to solve this issue. Still, if you have any doubts, feel free to drop a comment below.
RELATED GUIDES:
[ad_2]
Source link
