[ad_1]
Whenever a Windows app fails to launch, we launch it with administrator rights. Running apps as an administrator seems to be an evergreen solution for various app related problems on Windows.
Windows 11 provides various ways to launch an app as an administrator. So, regardless of whether your app is placed on the desktop, in the Start Menu, or somewhere else in your File Explorer, you can launch it with the administrator in simple steps.
How to Run Apps as Administrator on Windows 11
In this guide, we will explore a few simple methods to run programs as an administrator on Windows 11. We will cover different methods to provide app admin privileges. Let’s get started.
1. Launch an App As Administrator from the Desktop
Installing an app on Windows 11 automatically creates a desktop shortcut for quicker access.
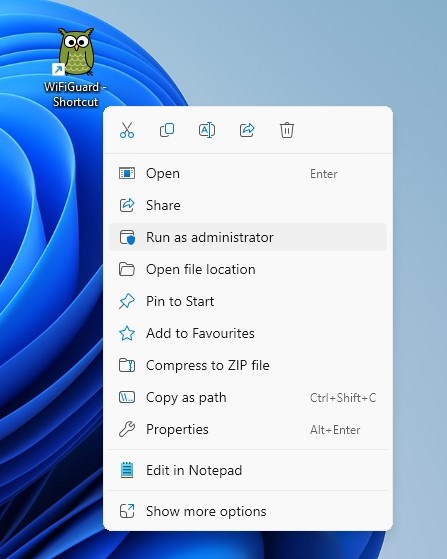
So, if the app’s shortcut is placed on your desktop, you can right-click it and select ‘Run as administrator’.
A User Account Control (UAC) prompt will appear; click Yes. This will immediately launch the app with admin rights.
2. Launch an App as Admin from Windows Search
You can easily access all programs installed on your PC via Windows Search. You can also run apps as admin directly from the Windows Search.
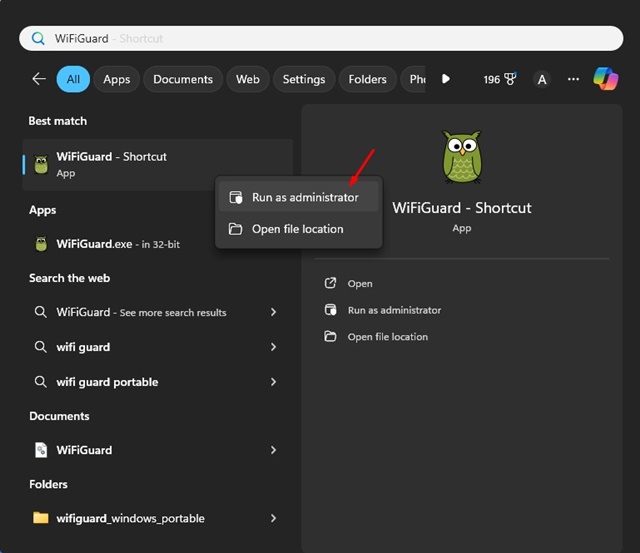
To run an app as an admin on Windows 11, open Windows Search and type the app’s name. When the app appears in the search results, right-click on it and select Run as administrator.
Similarly, if an app shortcut is placed on the Start Menu, you can right click on the shortcut and select Run as administrator.
Selecting the Run as administrator on Windows Search or Start Menu will open the User Account Control (UAC) prompt; select Yes.
3. Run App As Admin from the Task Manager
You can utilize the Windows Task Manager as well to run programs as aministrator on Windows 11. Here’s how to use the Task Manager to Run apps as an administrator.
1. Type in Task Manager on the Windows 11 Search. Next, open the Task Manager app from the list of search results.
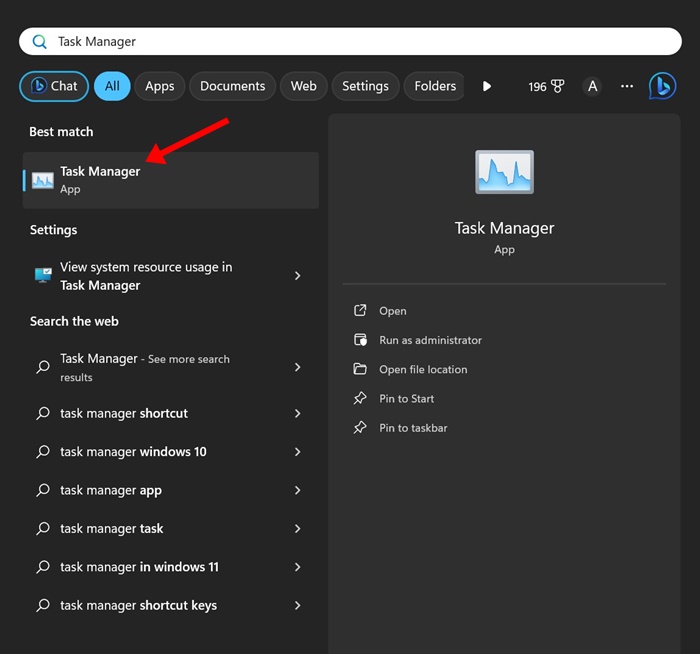
2. When the Task Manager opens, click the Run new task button.
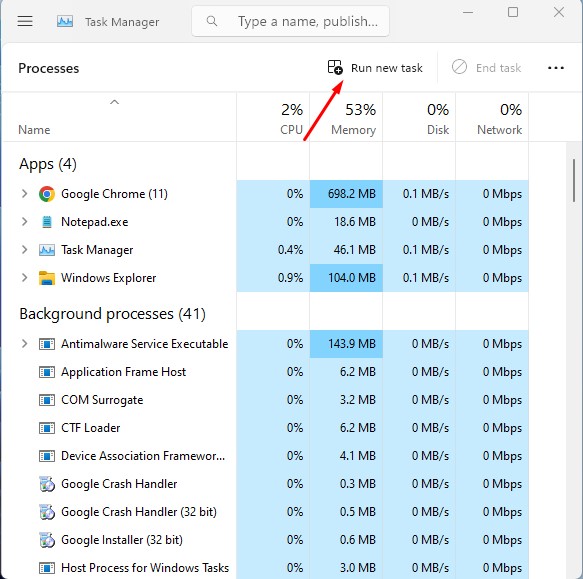
3. On the Create New Task dialog box, enter the app’s executable name.
4. Next, check the ‘Create this task with administrative privileges’ option and click OK.
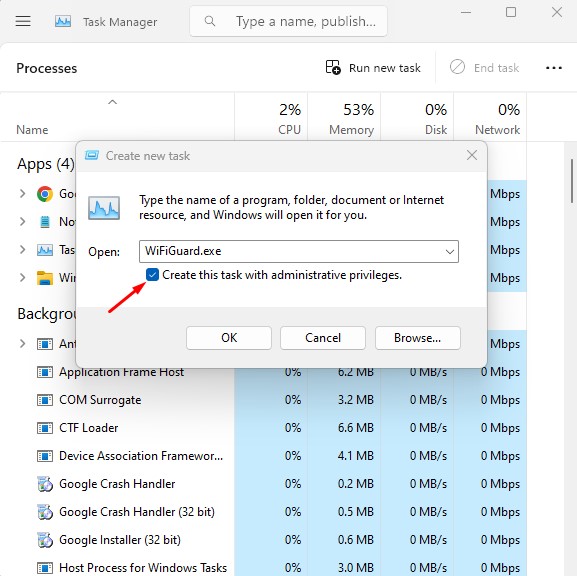
That’s it! This will launch the app as an administrator on your Windows 11 PC.
4. How to Always Run an app with administrator rights
On Windows 11, you can force an app to always launch with admin rights. To do that, follow the steps we have shared below. We have used the Spotify application to demonstrate the steps.
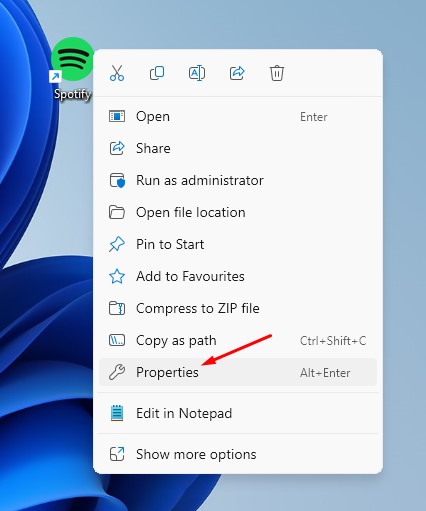
1. Right-click on the App Shortcut on your desktop and select Properties.
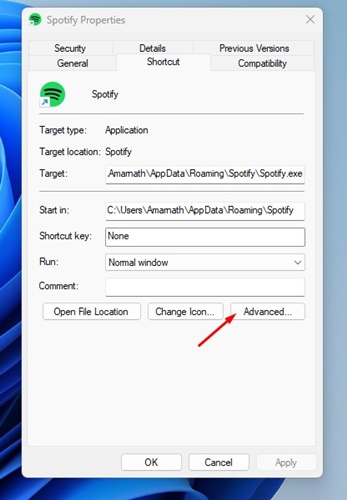
2. On the App Properties, switch to the Shortcut tab.
3. Next, click the Advanced button at the bottom right corner.
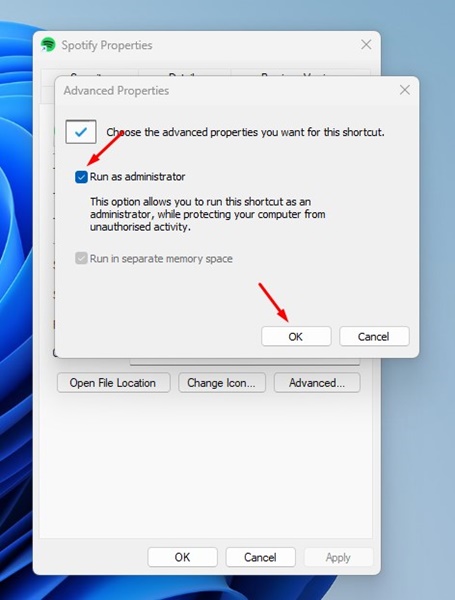
4. On the Advanced Properties, check the Run as administrator and click OK.
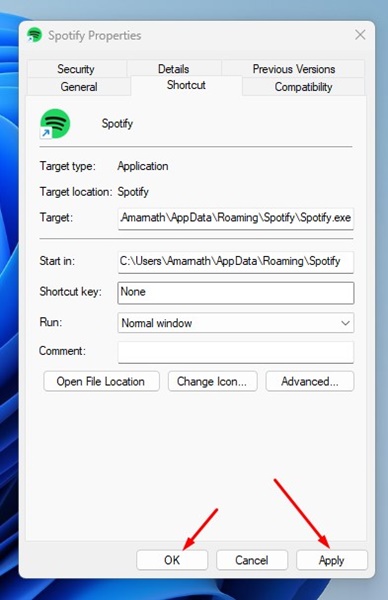
5. Once done, click on Apply, then OK to save the changes.
That’s it! This is how you can run an app as an administrator on Windows 11.
How to Check If an App is Running as an administrator?
You can confirm whether an app runs as an administrator via Task Manager. To do that, follow the steps shared below.
1. Type in Task Manager on the Windows Search. Next, open the Task Manager app from the list of search results.

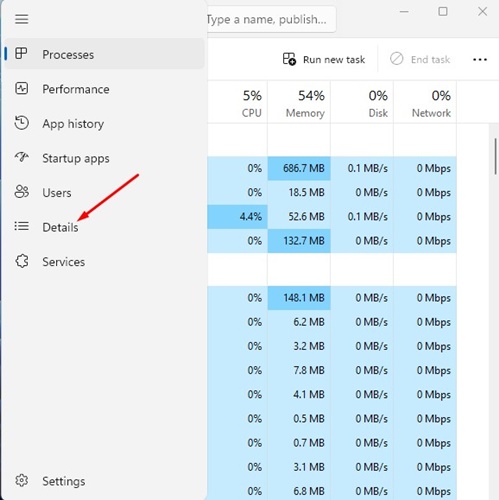
2. When the Task Manage opens, switch to the Details tab at the left sidebar.
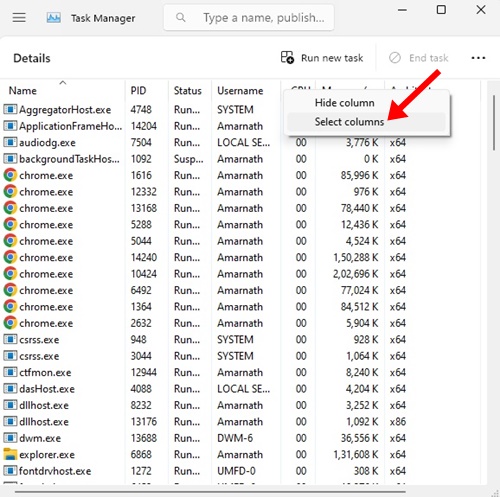
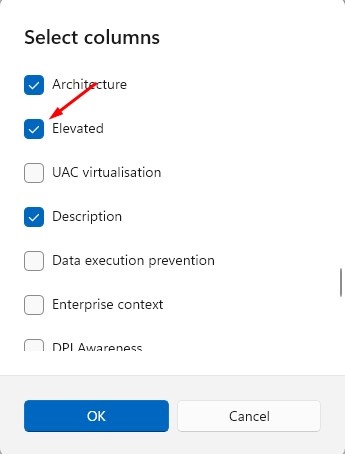
3. On the right side, right-click on any column and select Select Columns.
4. On the Select Columns prompt, check the Elevated and click OK.
5. On the Elevated Column, you can see which apps are running as an administrator.
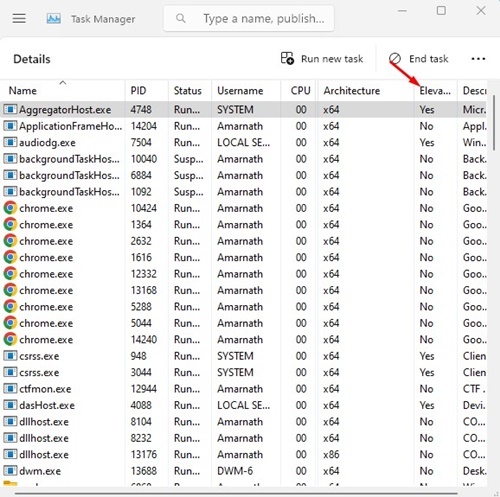
That’s it! This is how you can check if an app is running with admin rights on Windows 11.
This guide explains how to run an app as an administrator on Windows 11. If you need more help on this topic, please let us know in the comments. Also, if you find this guide helpful, don’t forget to share it with your friends.
[ad_2]
Source link
