[ad_1]
iPhone has a large user base worldwide, and people are always excited to get the latest model. However, what will you do if your iPhone is stolen? Many people are unaware of the steps to be taken in such a situation. If you are one of them and want to know what action to take, continue reading this article.
Phones have become an important part of our daily lives. We do many things on it, such as paying bills, ordering food, and transferring money. We store personal information, including bank details and other important accounts, on it. If your phone gets stolen, there is a high possibility that someone may misuse your personal data and bank details.
In this article, we will guide you on what you can do to get your stolen iPhone back. If your iPhone has already been stolen, follow the steps below properly to get your iPhone back.
Things to Do When Your iPhone is Stolen
We have mentioned the best steps to get your stolen iPhone back here. All these steps are very important, so make sure to read this article properly.
1. Mark iPhone As Lost
The first step you should take whenever you lose your phone or someone steals it is to activate Lost Mode, which will lock your phone and display a message on your iPhone to return it safely. Follow the steps below to turn on Lost Mode on your iPhone.
- Open the Browser on your other phone or computer.
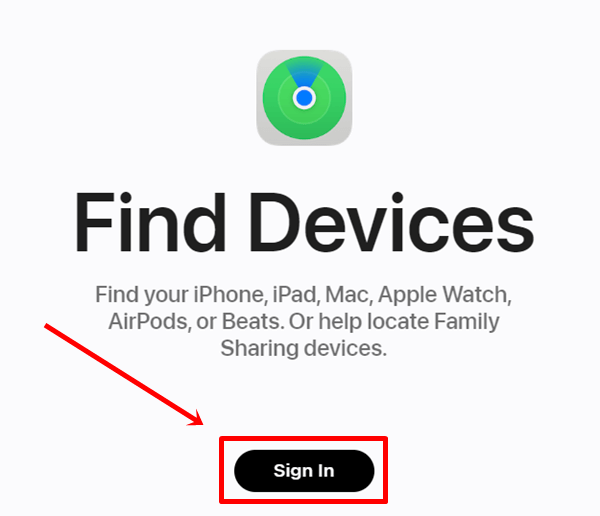
- Go to the Apple Find My Device website and click on the sign-in button.
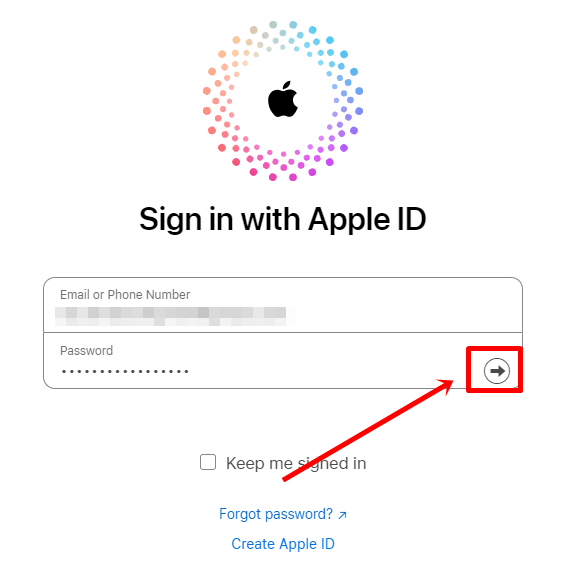
- Enter your Apple ID and click on the arrow to sign in.
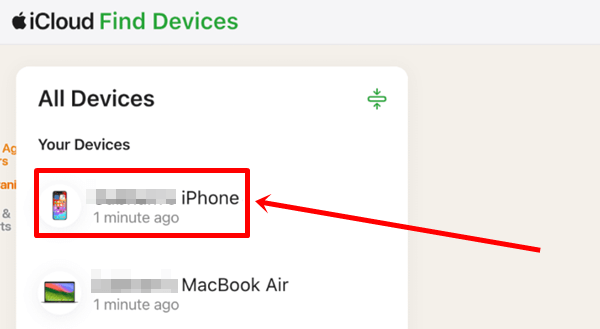
- Select your iPhone device from the list of devices.
- Tap on Mark As Lost. If you lost your phone at home, you can use the Play Sound feature to find it.
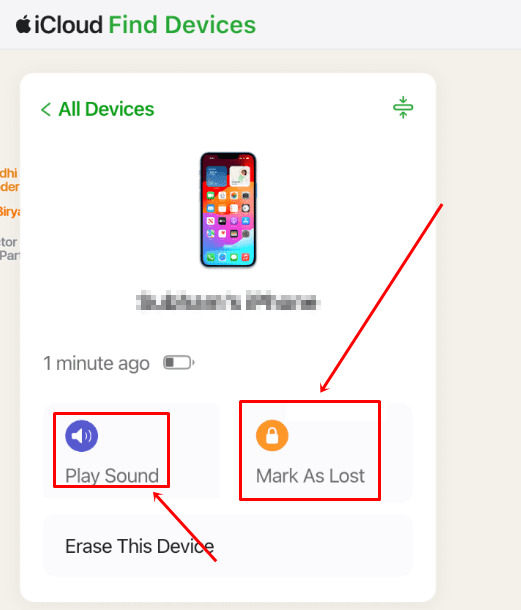
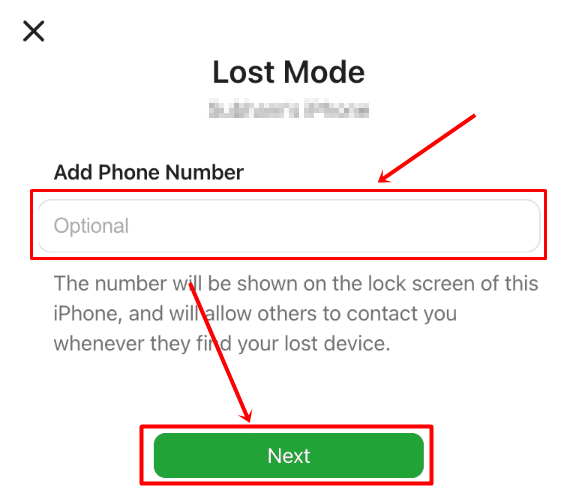
- You will see a popup box, click on the Next button to lock your iPhone and leave a message along with your phone number.

- Lastly, enter your number and message so that the person who has your phone can contact you.
2. Erase Data From iPhone
After successfully locking your iPhone, you can now delete all the data from it. Yes, if you have personal information and data in your iPhone then you can delete it very easily and it will not affect the lock mode either.
- Open the Apple Find My Device site on the browser and sign in with your Apple ID.

- Enter the Apple ID, and then tap on the arrow sign to sign in.

- In the list of all devices, select your iPhone.

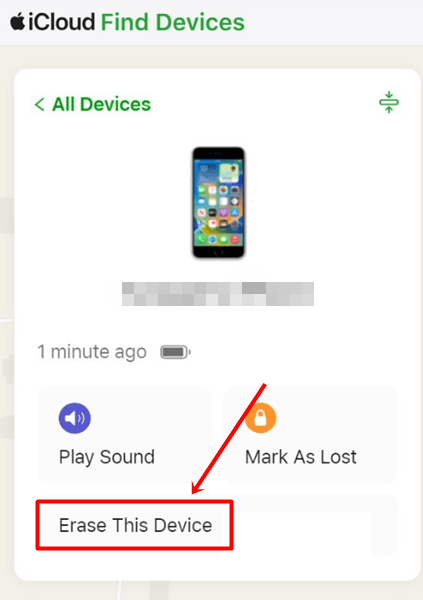
- Tap on the Erase This Device option.
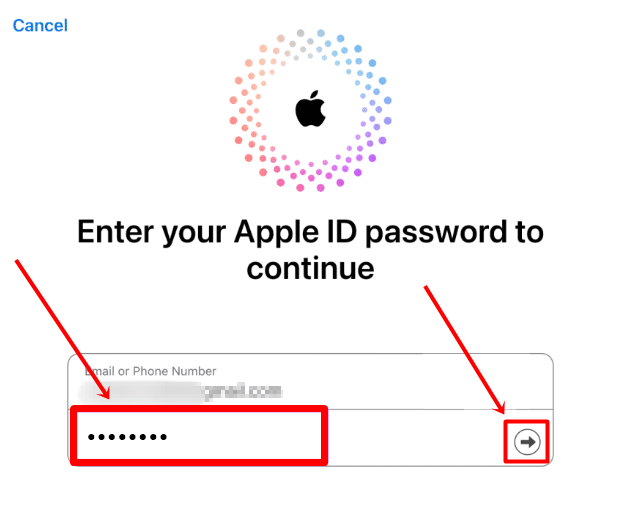
- Enter your Apple ID and password again for confirmation.
3. Remove Connected Bank Card Details
If you’ve connected your bank details to Apple Wallet, you should remove them from your iPhone. In any case, if the person who has your phone manages to unlock your iPhone, they can misuse it. To delete card details follow the steps given below.
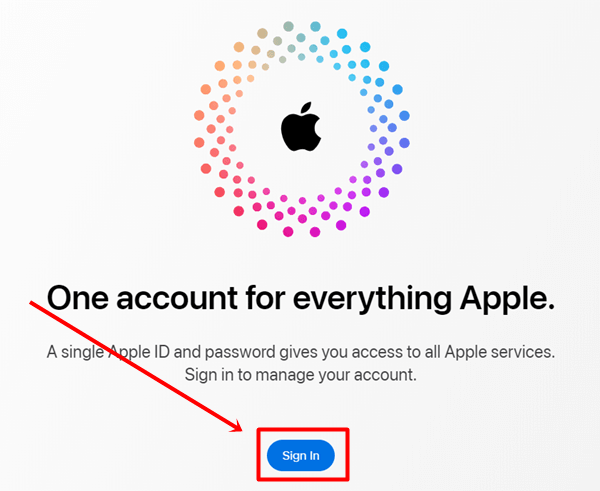
- Go to the browser and open the Apple ID website.
- Click on the Sign In button and enter your Apple ID and password.
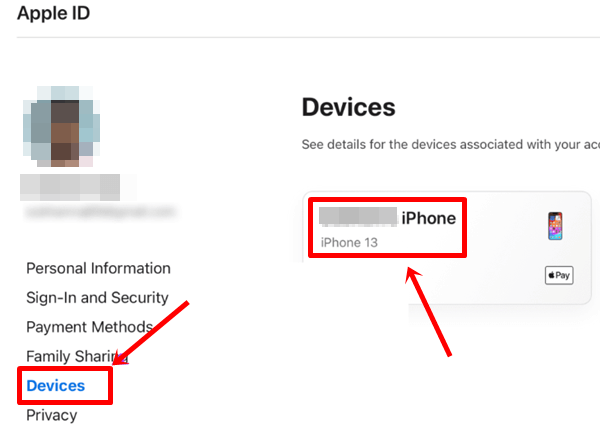
- In the left menu, click on Devices, and then select your iPhone from the right window.
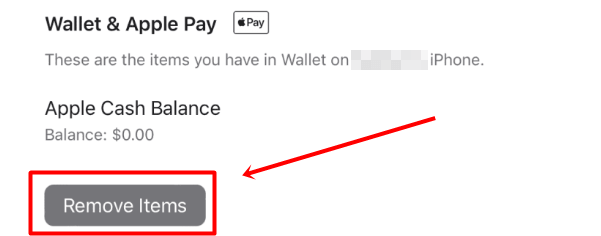
- Go to the Wallet & Apple Pay section and click on the Remove Items button.
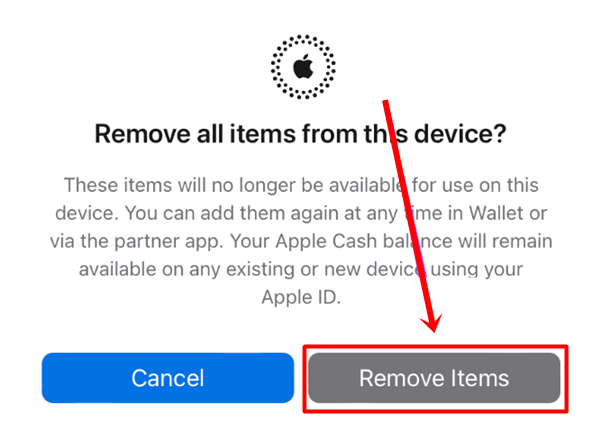
- Click on Remove Items again to confirm.
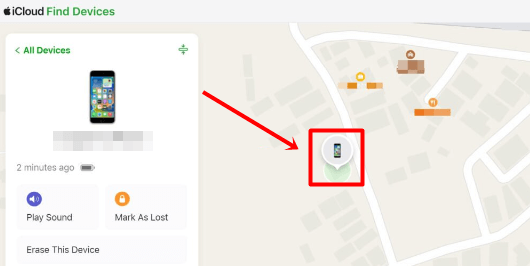
4. Track the Stolen Phone
iPhone’s tracking feature lets you track your phone until its battery runs out. Even if someone turns off your phone but there is still a battery left, you can still track the location of your iPhone. Follow the steps below to learn how to track its location.
- Go to the official Apple Find My Device website and sign in with your Apple account.

- Select your iPhone from the list of devices.

- Now, on the right side, you will see your iPhone’s current location.
5. File a Police Complaint
Once you lock your iPhone and delete all the data from your phone, go to your nearest police station and file a complaint. If your phone is on, they can help you track and recover your device.
Filing a complaint is also helpful in protecting yourself from any illegal actions, as there are chances that a thief may use your phone for illegal activities. Reporting a complaint about a stolen phone will protect you.
6. File an iPhone Replacement Claim with Apple Care+
If you have an AppleCare+ subscription, you can file a claim for an iPhone replacement from Apple. To know the process, follow the steps below.
- Go to the iPhone Theft and Loss Coverage page and click on the Start your claim online button.
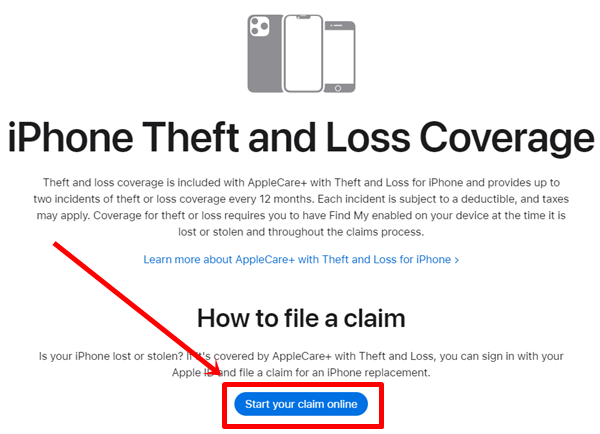
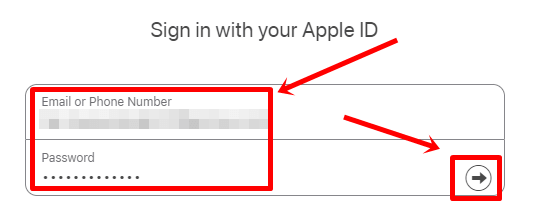
- Sign in with your Apple ID.
- Now, wait for the claim to be approved.
List of Countries that support Apple Care+
- Australia
- Austria
- Chile
- Denmark
- Finland
- France
- Germany
- Italy
- Ireland
- Japan
- Netherlands
- New Zealand
- Norway
- Spain
- Sweden
- Switzerland
- United Kingdom
- United States
7. Remove the Device From Your iCloud
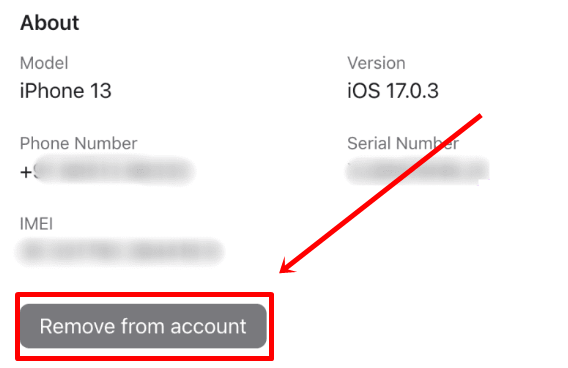
If there is no possibility that you can get your stolen phone back and you want to delete your iCloud account from that iPhone, follow the steps below.
Note: Don’t remove your Apple account from the iPhone until you receive full claim approval.
- Go to the Apple ID website and sign in with your Apple account.

- Click on the Devices option on the left, then select your iPhone.

- Scroll down to the About section and click on the Remove from Account button.
8. Deactivate Your Number
Deactivating the number is also a very important step because a thief can use your SIM for illegal activities, which can land you in trouble. So, if you can’t visit the carrier’s store, you can contact the customer support of the SIM company, explain the situation, and ask them to deactivate your SIM immediately.
After deactivation, the thief will not be able to use your SIM, and you can go to the SIM company store and get your SIM card reissued. Simply submit your registered ID proof, and they will provide you with a reissued SIM card on the spot.
Conclusion
That’s all for this article. I hope now you know what to do if your iPhone is stolen. These are the most important steps that every iPhone user should know about. If your phone is lost or stolen, follow these steps to increase your chances of getting your iPhone back.
If you found this guide informative, please share it with your friends who use iPhones. For any questions related to this topic, feel free to share with us in the comment section, and we will provide you with the answer.
[ad_2]
Source link
