[ad_1]
BlueStacks is an Android emulator which you can use to run Android apps on your Windows PC. Even though Windows 11 supports Android apps natively, people still find BlueStacks to be the best option to get Android apps for their PC.
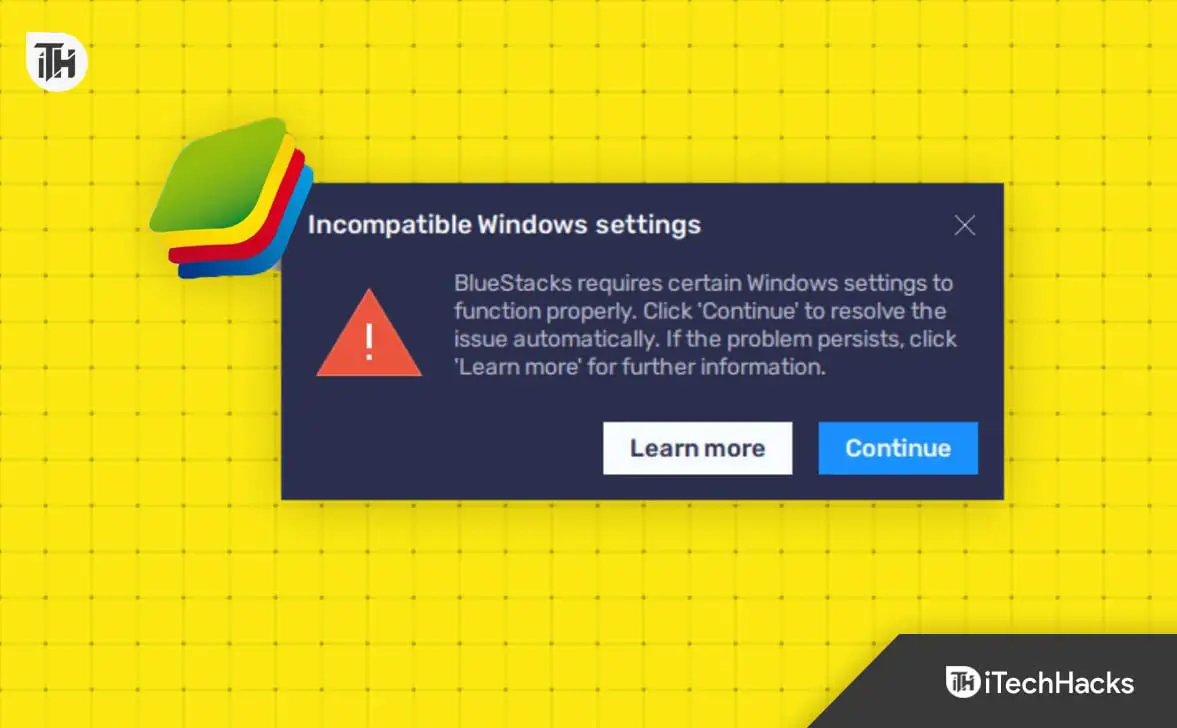
Of course, the reason behind this is the stability and better app compatibility offered by the BlueStacks. Even though BlueStacks is much more stable, you can still face issues like ‘Incompatible Windows Settings.’
How to Fix BlueStacks ‘Incompatible Windows Settings’ Error
Many users report this issue, and it can be a complete mess, preventing you from launching BlueStacks on your PC. Let’s discuss how to get past this error and use BlueStacks without any problem.

Disable Hyper –V
BlueStacks Incompatible Windows Settings issues occur due to Hyper-V. Virtual Machine and Hyper-V can interrupt the proper functioning of the BlueStacks, and the emulator can fail to launch and may go through the ‘Incompatible Windows Settings’. You can disable the Hyper-V from the Windows Features Settings by following the steps given below-
- Open the Start Menu by clicking on the Start icon on the taskbar. Search for Turn Windows Features On or Off and press Enter.

- From the Windows Features list, search for Hyper-V and uncheck the checkbox next to it.
- Along with Hyper-V, uncheck the following options as well-
- Windows Hypervisor Platform
- Windows Sandbox
- Virtual Machine Platform
- Windows Subsystem for Linux
- Now, click on the OK button.

- You will be asked to restart your PC for the changes to be completed. Save all the opened works, and click on the Restart Now button.
- After the restart, try launching the BlueStacks again, and it should work without throwing any type of error.
Launch BlueStacks with Administrative Privileges
BlueStacks needs administrative privileges. You need to run BlueStacks as administrative to avoid such errors. The steps below will assist you with that-
- Press the Windows key on your keyboard, and then type BlueStacks.
- From the search results, select BlueStacks and then click on Run as Administrator.

- A UAC prompt will appear. Click on Yes to continue.
- This will run BlueStacks as administrator, and you won’t encounter this issue.
Turn Off Memory Integrity
Though ‘Incompatible Windows Settings’ is encountered due to Hyper-V, many users have suggested that disabling the Memory Integrity solved the issue for them.
- Open Windows Search by pressing Windows + S, searching for Windows Security, and launching it.
- On the left pane, click on Device Security.

- Under the Core Isolation section, click on Core Isolation Details.

- Turn off the toggle under the Memory Integrity.

- You will have to restart your PC after this for the changes to be made.
Uninstall Windows Update
If you started getting this issue after installing some Windows update, then that Windows Update is probably at fault. Try uninstalling the Windows Update and then check if you still face this issue. Here’s how you can do it-
- Press the Windows + I keys together to launch the Settings.
- In Settings, click on Windows Update on the left pane, and then click on Update History.

- Under the Related Settings section, click on Uninstall Updates.

- You will see all the recently installed updates. Click on the Uninstall option next to the update you want to uninstall.

- Click on Uninstall again to confirm uninstalling the update.
Update BlueStacks
It is always recommended to use the latest BlueStacks for better stability and performance. Outdated Bluestacks can also be the reason behind the ‘Incompatible Windows Settings’ error shown by the BlueStacks.
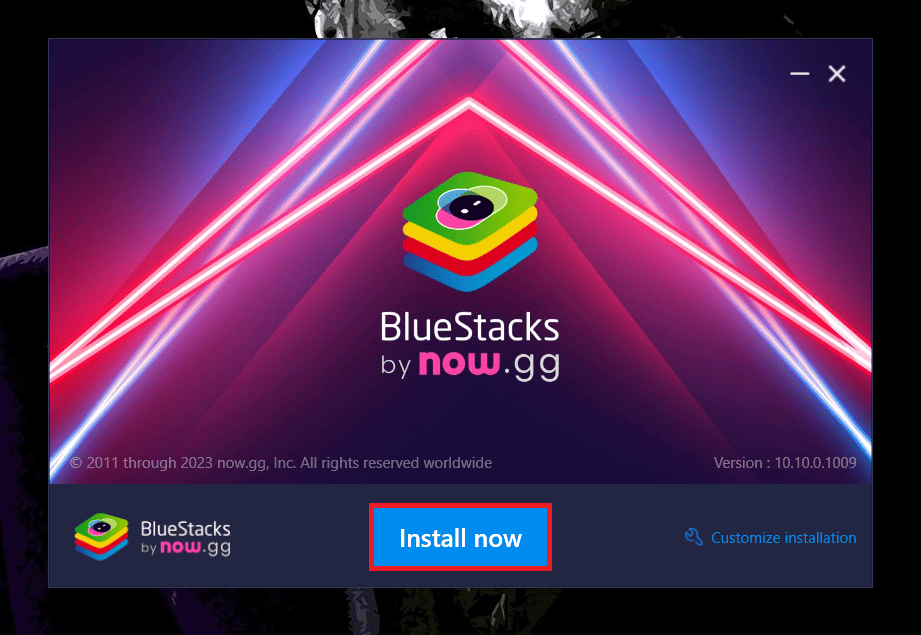
You can download the latest version of the BlueStacks from the website and install it. The steps for this are mentioned below-
- Head to the official BlueStacks site. Click on the Download button to download the latest BlueStacks.

- Launch File Explorer from the icon on the taskbar, and then head to the Downloads folder.
- Now, double-click on the downloaded BlueStacks setup file.

- When the BlueStacks installation wizard opens up, click on the Install Now button.
- You will be asked to agree to BlueStacks Terms of Use; click on I Agree to continue.

- BlueStacks will download all the files required for the installation.

- After the installation, BlueStacks will launch without any error.

Reinstall BlueStacks
Lastly, if none of the above steps solves the issue, reinstall the BlueStacks. If the issue was caused by the corrupted installation files, then reinstalling BlueStacks will fix the issue.
- Launch the Settings on your Windows PC by using the Windows + I keyboard shortcut.
- Click on the Apps on the left pane, and then click on Installed Apps.

- Click on the three dots next to BlueStacks App Player, and then click on Uninstall. Confirm uninstalling by clicking on Uninstall again.

- Click Yes on the UAC prompt.
- When the uninstallation window opens up, select the reason to uninstall the app (optional) and click on Uninstall.

- Similarly, uninstall BlueStacks X and BlueStacks Services.
- Once done, restart your PC.
- Now, download and install BlueStacks from the official site. For this part, you can follow the previous method (Update BlueStacks method).
Bottom Line
BlueStacks Incompatible Windows Settings issue is caused by Hyper-V and Virtual Machine and should be fixed by disabling the Hyper-V. The steps for this have been discussed in the article above. In case if disabling the Hyper- didn’t fix the issue, then we have listed other methods that should help you fix the issue.
READ MORE:
[ad_2]
Source link