[ad_1]
Google Chrome is one of the most demanding web browsers that every user uses on their device, whether it is Windows, Mac, Android, or iPhone. Recently, we have experienced a Chrome crashing issue in Windows 11. It not only crashes but also freezes for minutes while browsing, which is so irritating.
We use Google Chrome for its features and security, but sometimes, we face these types of problems due to glitches or other reasons. If you are also facing this crashing issue on your Windows 11, then continue reading this article.
When we noticed this problem on our computer, we started researching to find the reason why Chrome crashes. In this article, we have created a list of the best ways to fix the Chrome crashing issue.
Why does Google Chrome Keeps crashing on Windows 11?
There are many reasons why Chrome crashes on Windows 11. Chrome may have stored some data that is causing problems while browsing. It can also happen due to high usage of system resources, leading to crashes.
In this article, we have discussed all the possible reasons for Chrome crashing issue. I recommend reading all the methods thoroughly.
Best Ways To Fix Chrome Keeps Crashing on Windows 11
To fix this Chrome crashing issue, it is very important to know all the possible solutions, so ensure you read all the information properly.
1. Restart your Computer
Restarting the computer is one of the fastest solutions to fix any sudden computer problem. Whenever there is a problem with your computer, the first thing to do is restart it.
A restart may fix the problem because sometimes, for whatever reason, the software doesn’t function properly. Restarting the computer will give Chrome a fresh start.
2. Run Chrome as an Administrator
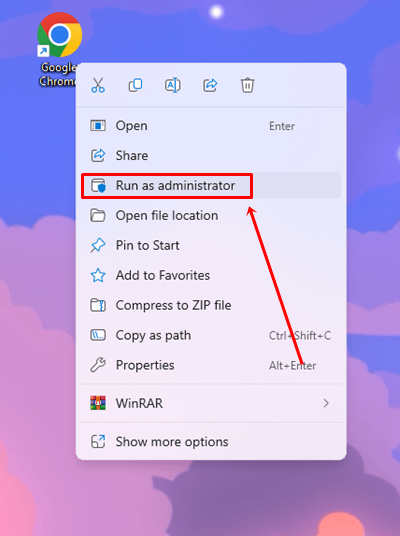
Sometimes, some features may be restricted due to limited user permissions, which you can resolve by running your Chrome browser as an administrator. Follow the steps below to access the administrator option.
- Right-click on the Chrome icon and select Run as administrator.
- If this resolves the issue, continue following the steps.
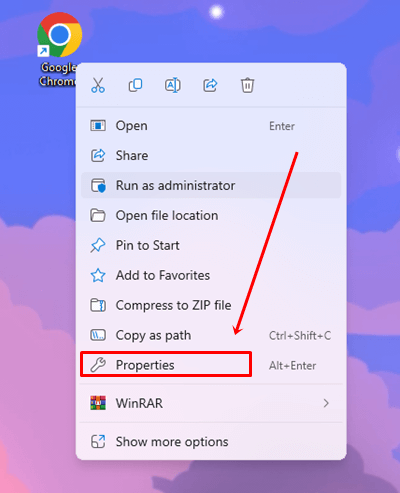
- Right-click on the Chrome icon and tap on the Properties option.
- In the Google Chrome properties, click on the Compatibility tab, then select Run this program as an administrator.
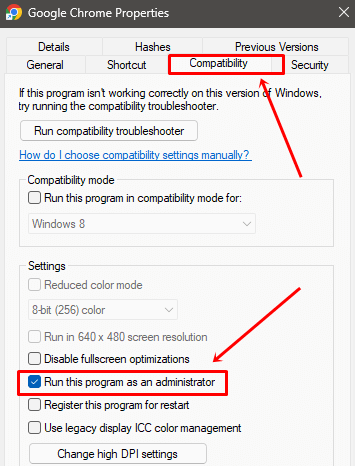
- Finally, click on the Apply button and then OK.
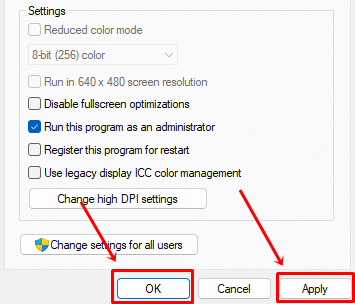
we are used to running software by simply clicking on it, it is not always possible to remember to select Administrator. So, now whenever you open Chrome, it automatically runs in administrator mode.
3. Check Background Running Processes
Go to Windows Task Manager(CTRL + Shift + ESC) and check the processes running in the background to identify which software is consuming too much memory. If you find any software that you are not currently using, right-click on it and select the End Task option.
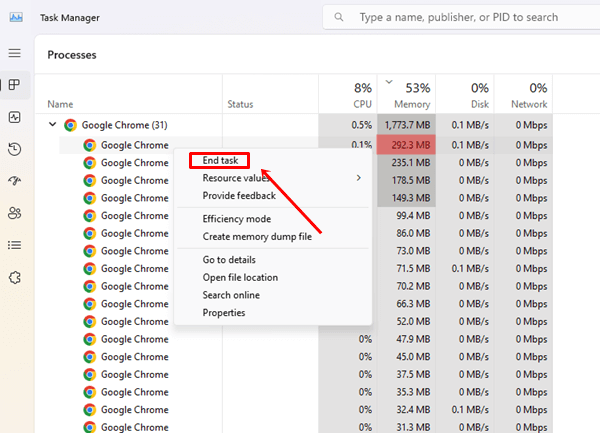
Sometimes, using different Chrome user accounts at the same time can also freeze your Chrome browser. In the taskbar, check how many Chrome browsers are running and identify which one is consuming more memory. Once you find it, use the End task option to resolve the issue.
4. Disable the Third-Party Antivirus
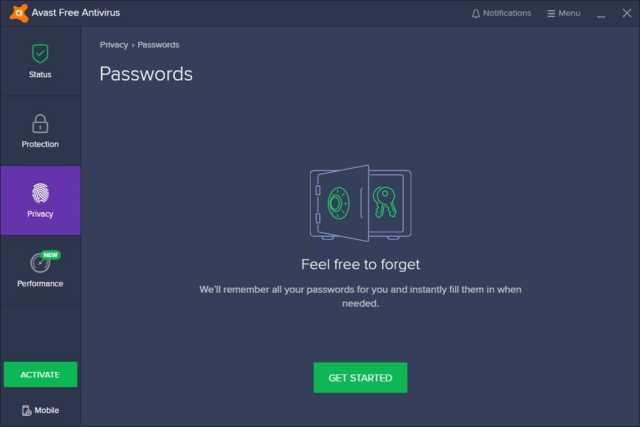
There is a possibility that the antivirus you are using is causing problems on your computer while running the Chrome browser. To check this, simply open your antivirus and disable all programs. Then, check if this fixes the crashing issue or not.
If it does then uninstall the antivirus permanently and use the Windows 11 default antivirus. If this does not resolve the issue, move to the next method.
5. Run Chrome Compatibility Troubleshooter
Running the Chrome Compatibility Troubleshooter will automatically identify and resolve compatibility issues. If your Chrome browser is crashing due to compatibility issues with your system, this tool can fix the problem quickly.
- Go to Chrome browser properties.

- Click on the Compatibility tab, then press the Run Compatibility Troubleshooter button.
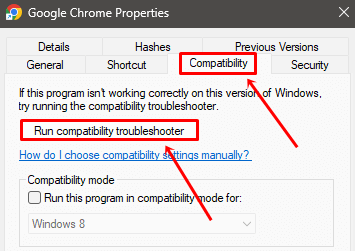
6. Disable Chrome Extensions
Extensions can also be the reason for Chrome browser crashes. To check, you need to disable all extensions. Follow the steps mentioned below.
- Open the Chrome browser and click on the three vertical dots icon at the top right corner.
- Go to Extensions > Manage Extensions.
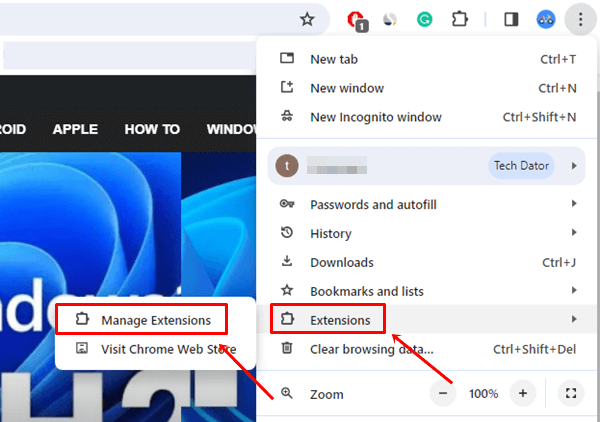
- Finally, disable all the extensions one by one and identify after which extension’s disablement will fix the crashing issue.
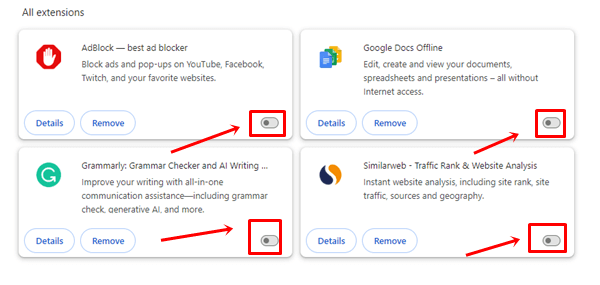
Once you’ve identified the culprit extension, remove it from your browser, and then enable the other extensions you disabled earlier.
7. Clear Cache and Cookies
There is a possibility that clearing the cache and cookies may solve the Chrome crashing issue because if your browser stores some corrupted files, they can crash your Chrome browser.
- Open your Chrome browser and click on the three vertical dots icon.
- Go to Clear browsing data (Ctrl+Shift+Del).
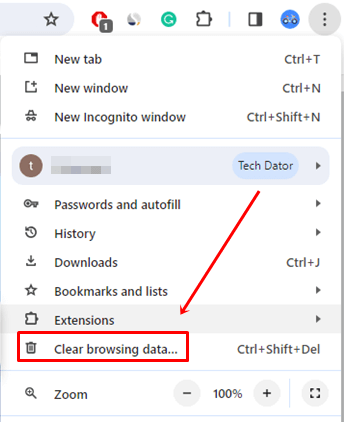
- Click on the Advanced option, then set the time range to All time. Select the Cookies and other site data and Cached images and files options. Last, click on the Clear data button.
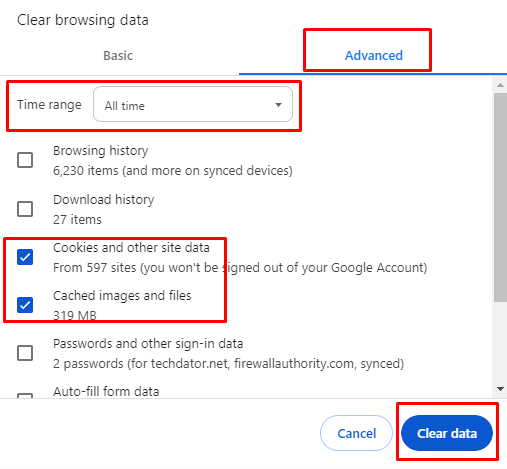
- After successfully cleaning the cache and cookies, restart your browser and check if the crashing issue is resolved or not.
8. Reset Chrome Settings
If you’re still experiencing this issue, try resetting Chrome settings. If there are bugs that are causing the Chrome browser to crash, resetting Chrome settings to default may fix the problem.
- Go to Chrome Settings.
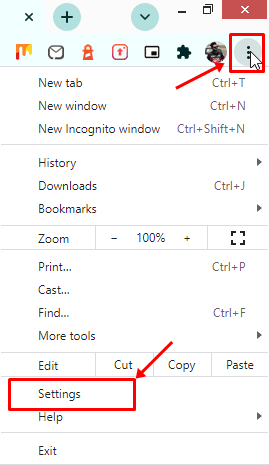
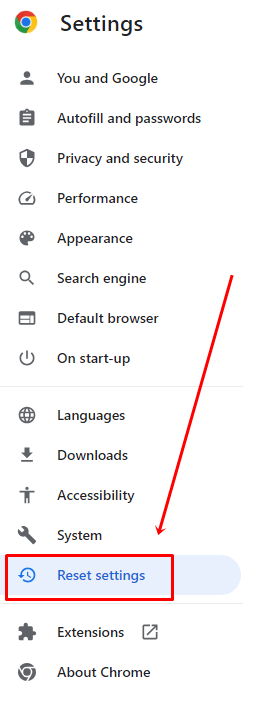
- In the Settings window, click on the Reset settings option at the bottom of the left menu.
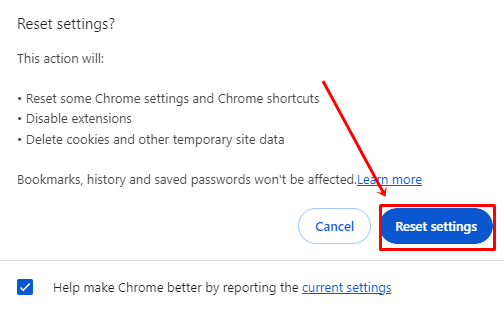
- Click on Restore settings to their original defaults.

- Finally, click on the Reset settings button.
9. Update Google Chrome
If you are using an older version of Google Chrome, there is a high chance that this problem is happening because of the outdated browser. So make sure to update your Chrome browser to the latest version.
- Go to Chrome Settings, then select the About Chrome option at the bottom left side.
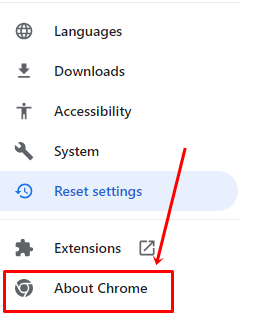
- When you click on the About Chrome option, it will start updating your browser automatically. You just have to wait until the update process is completed.
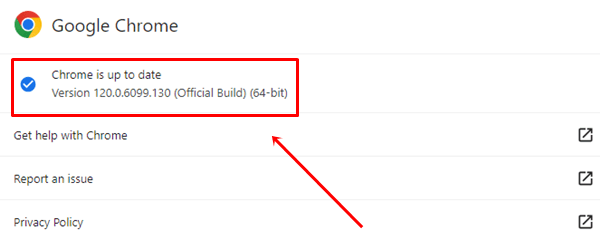
- Once your browser is successfully updated, restart your browser.
10. Reinstall the Google Chrome browser
If none of the methods work, uninstall your Chrome browser and reinstall it. When you reinstall the browser, it will start from scratch. Follow the steps given below.
- Press the Windows key and type Chrome in the search bar.
- Right-click on the Chrome icon and select the Uninstall option.
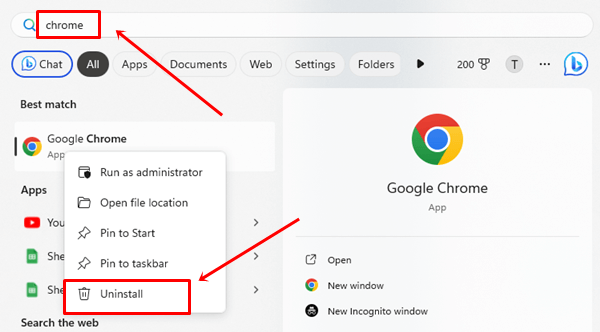
- Now Restart your computer.
- Go to the Edge browser and search for Google Chrome, then click on Download Now.
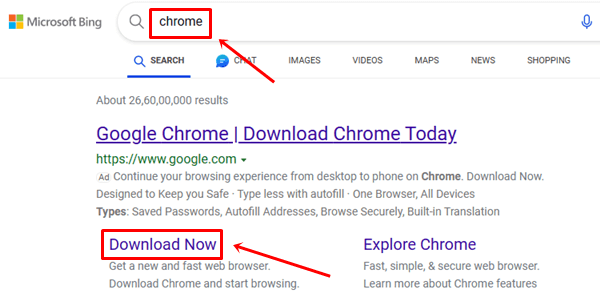
- Click on the Download Chrome button.
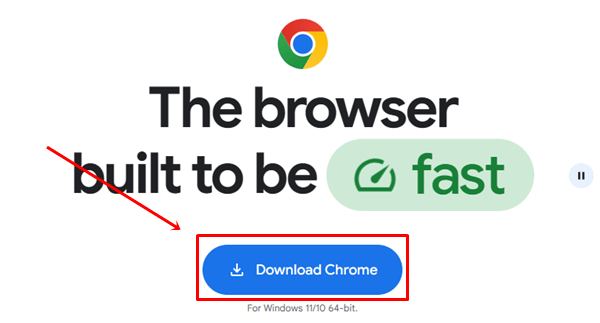
- Wait for the file to download, then click on it and install it on your computer.
11. Contact Google Support
If you are still experiencing this issue, the last option you can try is to contact Google Support and explain your problem clearly. If you don’t know how to contact them, follow the steps below.
- Click on the three vertical dots icon, then go to Help and select the Report an issue option.

- Describe your issue, then select the options, and click on the Send button.
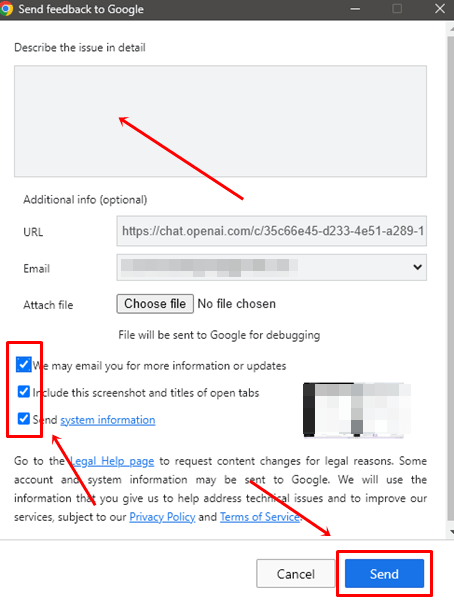
Now, wait until they email you with the solution to your problem.
Conclusion
Here, I am wrapping up this guide. I hope you found it informative and useful. All methods mentioned in this article have been thoroughly tested by us, including each step.
We assure you that you will not face any problem while following the steps of any method. However, if you encounter any issues, please share them in the comments section, and we will provide the solution as soon as possible.
[ad_2]
Source link
