[ad_1]
On Windows 11, you don’t need antivirus software to protect your device from possible threats such as viruses, malware, ransomware., etc. You get a built-in security system with Windows 11 called Windows Security that runs in the background and protects your computer from various threats.
If you already use Windows Security, you might know that the security app records its scans and actions in the Protection History folder. The Windows Security Protection history folder allows you to review the changes and undo them.
While Windows Security keeps the record of its scan for fair reasons, at times, you might want to clear it. If you have never checked the Protection History folder of Windows Security, it is likely to be a complete mess. So, to have more control and proper view, it’s best to clear the Protection history folder in Windows 11.
How to Update Drivers on Windows 11
How to Clear Windows Defender Protection History on Windows 11
Hence, if you are looking for ways to clear the Microsoft Defender or Windows Security Protection History on Windows 11, you have landed on the right page.
Important Things to Do Before Cleaning the Protection History
Before you go ahead and follow the steps to clear your Windows Defender Protection history, it’s important to scan your PC for viruses & malware with any reliable antimalware scanner.
This is to assure that your PC is clean and safe, and there’s no room for security threats to enter your computer if something goes wrong while making changes to the Windows Security or Defender.
You can use any reliable malware scanner like Malwarebytes or AVG Antivirus. You can check our list of best antivirus tools to pick the best security software for your computer.
Below, we have shared a few of the best ways to clear Windows Security Protection History on Windows 11. Let’s check out.
1. Clear Windows Security Protection History Manually
This method will manually clear the Protection history from the local drive. Here are some of the simple steps you need to follow.
1. First, open the File Explorer of your computer (Windows + E). When the File Explorer opens, open the Windows installation drive, usually C: drive for most users.
2. Now click on the View option at the top.
3. On the menu that appears, select Show > Hidden Items.
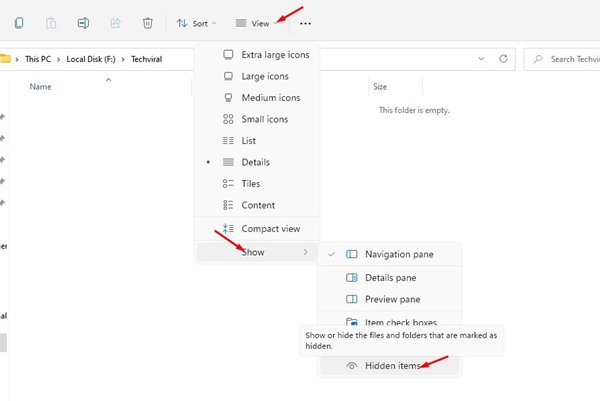
4. Now navigate to this path:
C:\ProgramData\Microsoft\Windows Defender\Scans\History
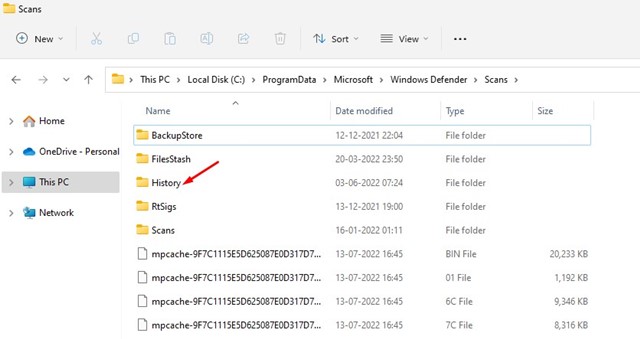
5. Double click on the Service in the History folder.
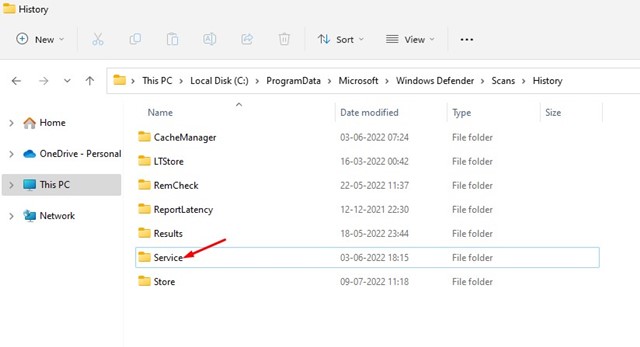
6. On the Service folder, right-click on the History and select Delete.

Important: If you are unable to delete that specific folder or file, boot your PC into safe mode and repeat the same steps. Booting the PC into safe mode works most of the time.
That’s it! This will clear the Protection History on your Windows 11 computer.
2. Clear Windows Security Protection History via Event Viewer
You can also use Event Viewer on Windows 11 to clear the Windows Security Protection History. For that, follow some of the simple steps we have shared below.
1. First, click the Windows 11 search and type in Event Viewer. Next, open the Event Viewer app from the list of options.
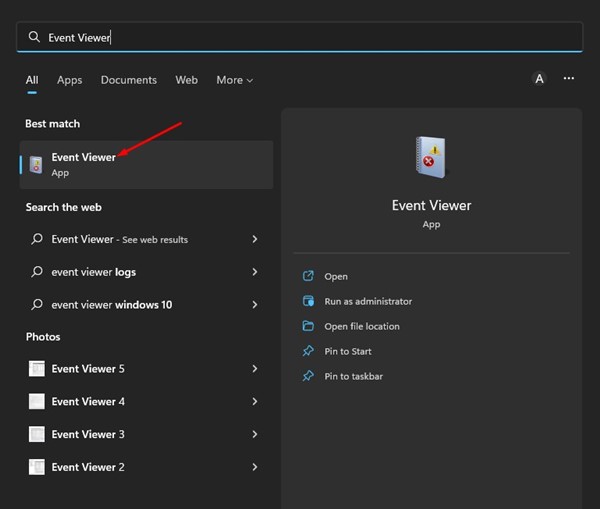
2. On the Event Viewer, select the Event Viewer (Local) and then expand the Applications and Services Logs.
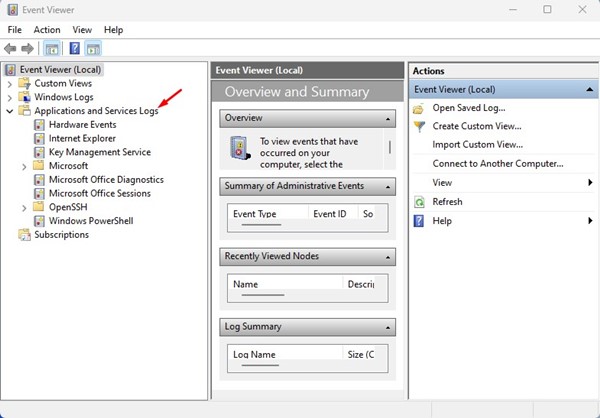
3. Next, select the Microsoft folder.
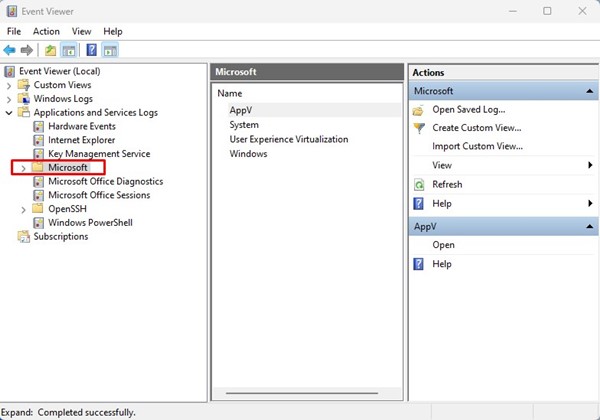
4. On the right side, double click on Windows.
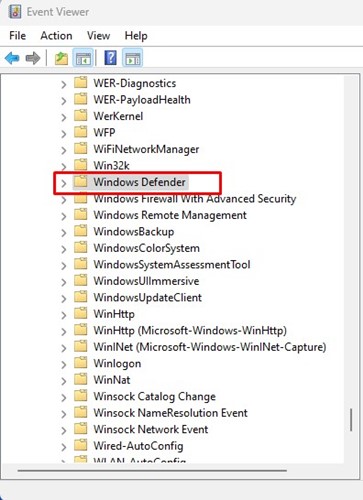
5. On Windows, scroll down and double-click on the Windows Defender.
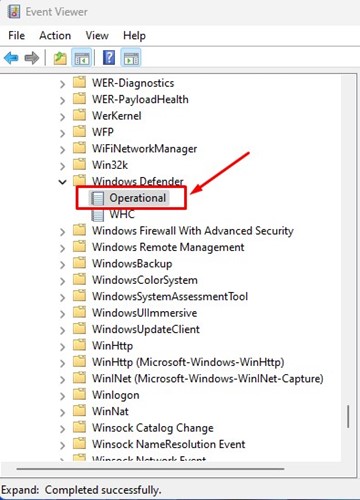
6. Next, double-click on the Operational on the Windows Defender.
7. On the right pane, click on the Clear log button as shown below.
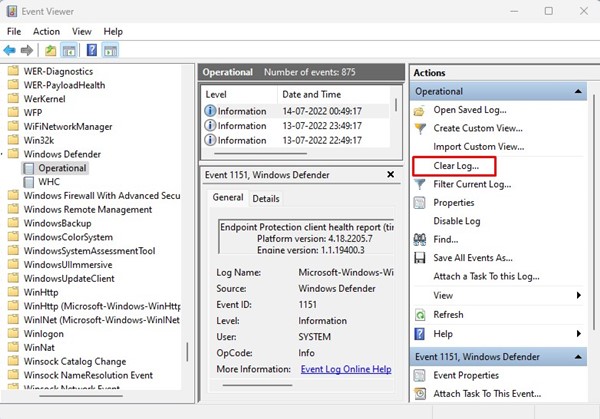
8. Now, you will see a confirmation prompt. Click on the Save and Clear button to clear the log.
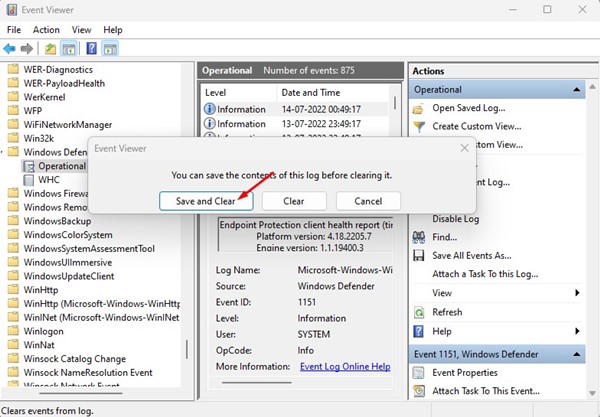
That’s it! This will clear the Microsoft Defender Protection History to log in to your Windows 11 computer.
3. Clear Windows Defender Protection History via Local Group Policy
The Local Group Policy editor can clear the Windows Security Protection History. You need to follow some of the simple steps we have shared below.
1. First, click on the Windows 11 search and type in Local Group Policy. Next, open the Local Group Policy Editor from the list.
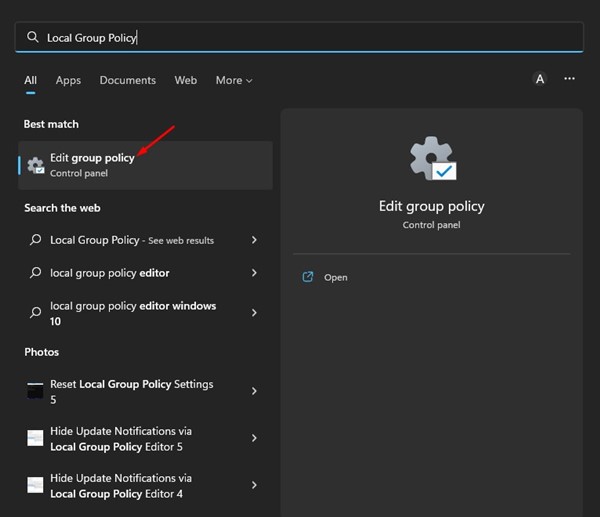
2. On the Local Group Policy Editor, navigate to the following path:
Computer Configuration > Administrative Templates > Windows Components > Microsoft Defender Antivirus > Scan.

3. On the right side, find and double-click the Turn on removing items from scan history.
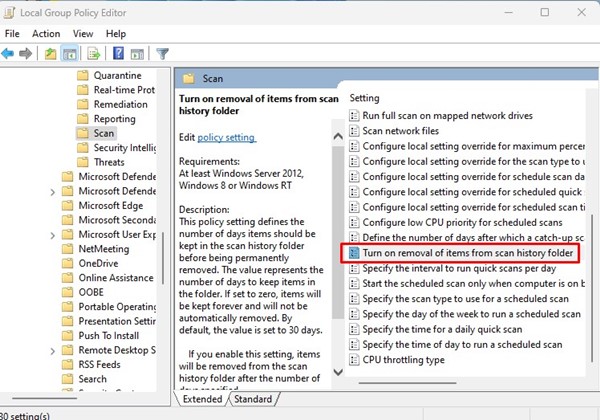
4. On the Window that appears, select ‘Enabled‘ and enter the time frame. Don’t set the number of days to zero, as zero means forever. You must enter the days you want Windows security to clear the protection history. Once done, click on the Ok button.
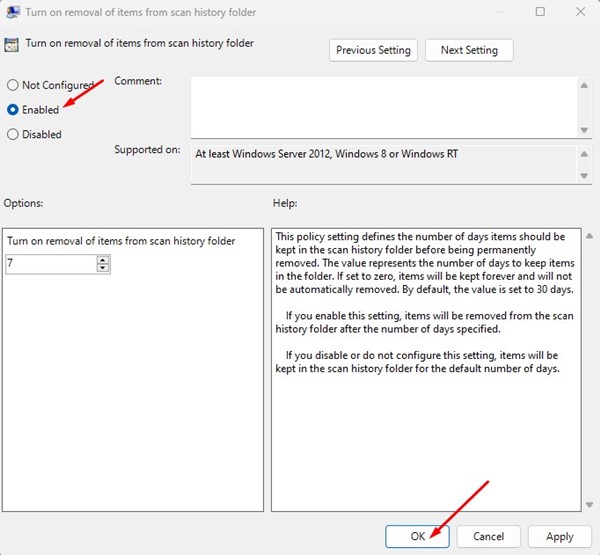
That’s it! This will automatically clear the Windows Security Protection History on Windows 11.
4. Clear Microsoft Defender Protection History via PowerShell
You can also use the PowerShell utility to clear the Microsoft Defender Protection History. For that, follow some of the simple steps we have shared below.
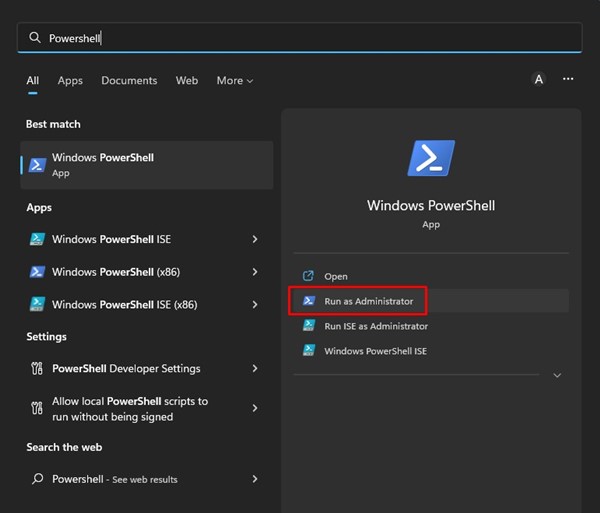
1. First, click on the Windows 11 search and type PowerShell. Next, right-click on PowerShell and select Run as administrator.
2. On the PowerShell Window, paste the following command and hit the Enter button.
Set-MpPreference -ScanPurgeItemsAfterDelay 5
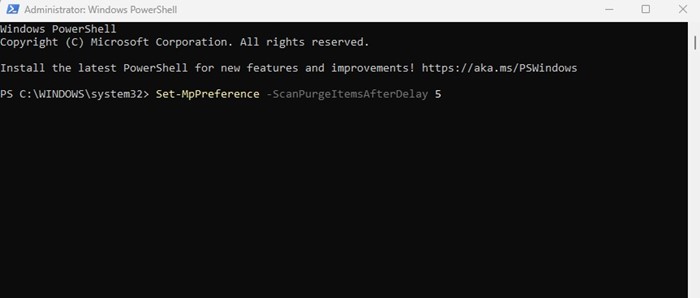
Important: The 5 at the end of the command represents the days after Windows security will clear the Protection History log. You can change the number as per your wish.
How to Fix Sleep Mode Not Working on Windows 11
So, these are some of the best ways to clear the Microsoft Defender or Windows Security Protection History log on Windows 11. If you need more help removing the Defender Protection history log, let us know in the comments below.
[ad_2]
Source link
