[ad_1]
We live in an era where communication is gradually becoming dependent on the internet. The online communication section received a massive boost during the COVID-19 Pandemic, forcing people to stay & communicate from home.
The pandemic has given rise to some awesome audio and video calling softwares that is free and offers amazing features. Even if you don’t use dedicated audio or video call softwares, you can still communicate with social networking platforms.
While participating in audio and video calls is super easy on a computer, many users face microphone problems, especially after installing Windows 11. Many users on Microsoft Forum reported that their voice is not reaching the recipient during audio/video calls.
If you are facing the same problem, continue reading the guide. Below, we have listed the possible reasons why there’s no sound on the Microphone and how the problems related to it could be fixed. Let’s get started.
Why voice is not reaching the recipient?
Well, various reasons lead to the recipient not being able to hear your problem. There are chances that the Microphone access is disabled on Windows 11, you have a faulty microphone, or the recipient sound device is not working.
So, there is not one but various reasons that lead to microphone no sound on Windows 11. However, the first thing you should do is ensure that the Microphone access is enabled on Windows 11.
If Microphone access is disabled on Windows 11, no apps can access your device’s Microphone. So, it’s very important to first enable the Microphone access in Windows 11.
How to Enable or Disable Microphone Access in Windows 11
Enabling or disabling Microphone access is super easy on Windows 11; you must access the Windows 11 Settings and then follow the steps below. Here’s what you need to do.
1. Click on the Windows Start button and select Settings.
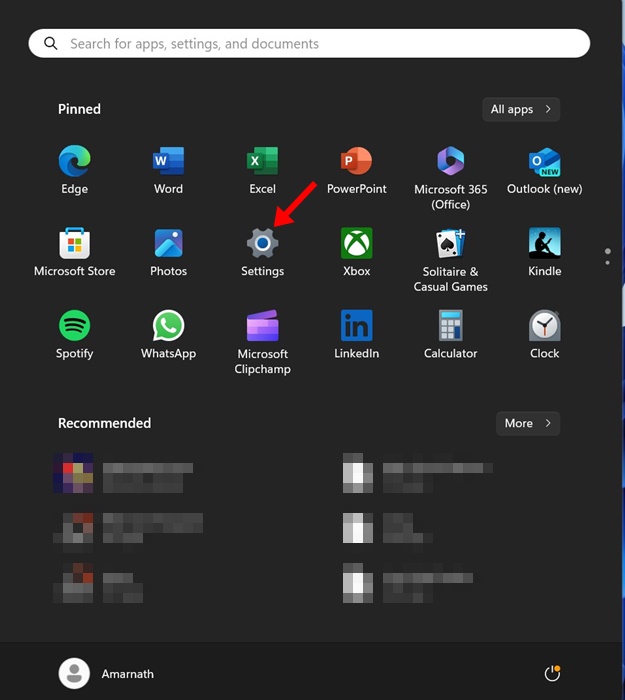
2. When the Settings app opens, switch to the Privacy & Security tab on the left pane.
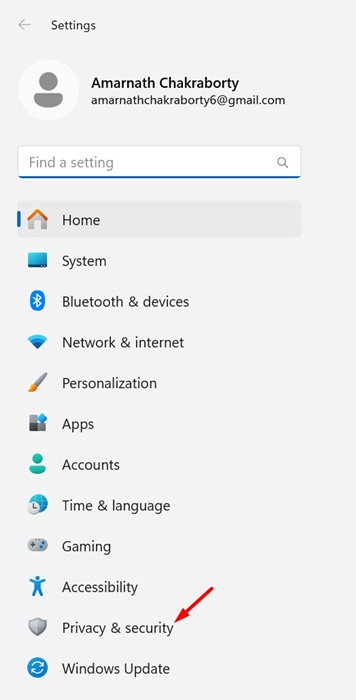
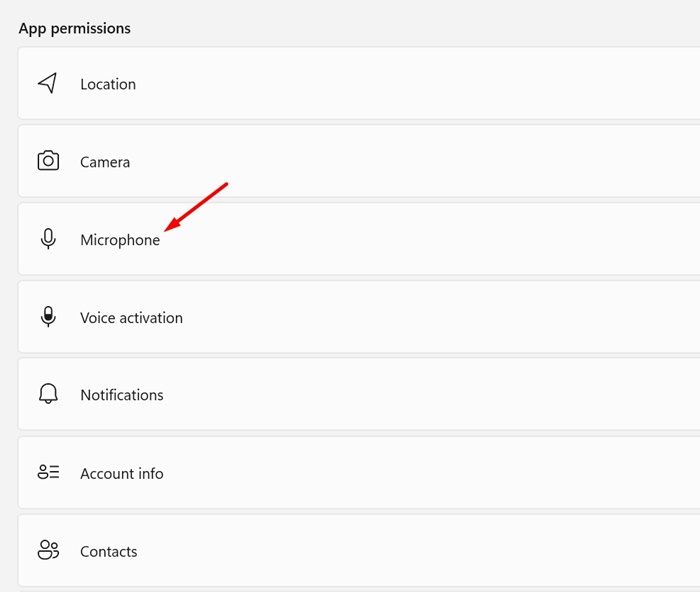
3. On the right side, scroll down to the App permissions and click on Microphone.
4. Next, toggle on the switch next to the Microphone access.

5. To disable the Microphone access, turn off the toggle beside Microphone access.
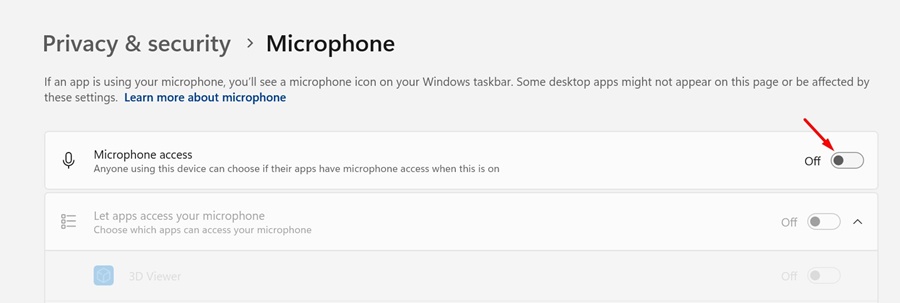
That’s it! This is how you can enable the Microphone access on Windows 11 via Settings.
How to Enable Microphone Access for Apps Individually
Windows 11 allows you to manually select apps that can access your Microphone. So, if you want, you can manually allow only specific apps to have access to your device’s Microphone, not all. Here’s what you need to do.
1. Click on the Windows Start button and select Settings.

2. When the Settings app opens, switch to the Privacy & Security tab on the left pane.

3. On the right side, scroll down to the App permissions and click on Microphone.

4. Next, toggle on the switch next to the Microphone access.

5. Now expand the Let apps access your microphone and manually enable or disable the Microphone access for the apps.
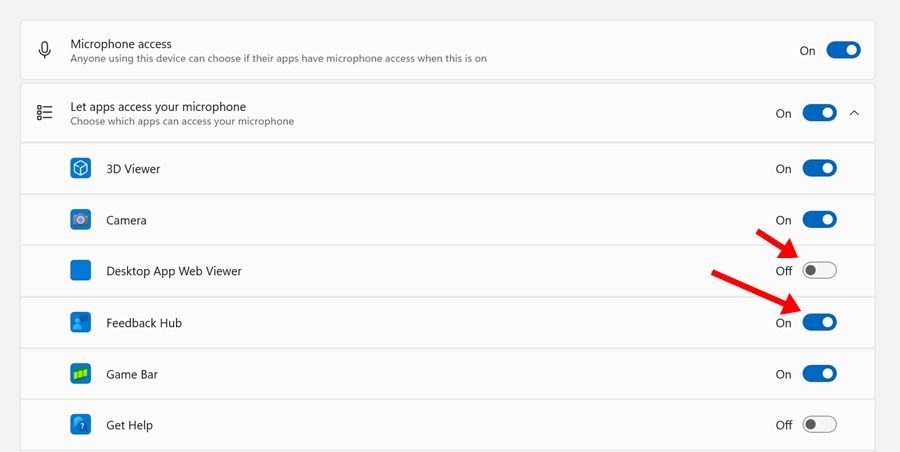
That’s it! This is how you can allow specific apps on Windows 11 to have access to Microphone.
How to Enable or Disable Microphone Access from Sound Settings
If, for any reason, you are unable to follow the method shared above, you can try this one to enable or disable Microphone using sound settings. Here’s what you need to do.
1. Click on the Windows 11 Start button and select Settings.

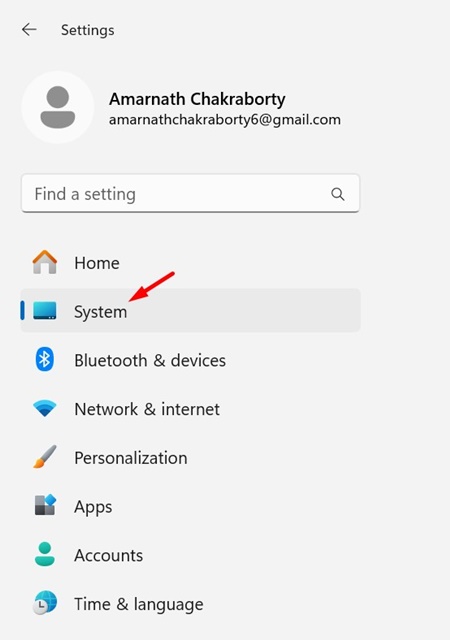
2. On the left pane, switch to the System tab.
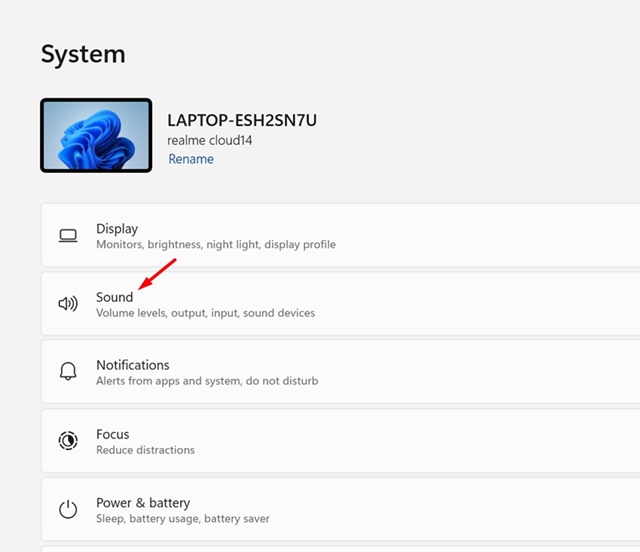
3. On the right pane, click on Sound.
4. Now navigate to the Microphone > Properties.
5. In the General section, click the Don’t Allow button for Audio to disable microphone access. To enable Microphone, click on the Allow option.
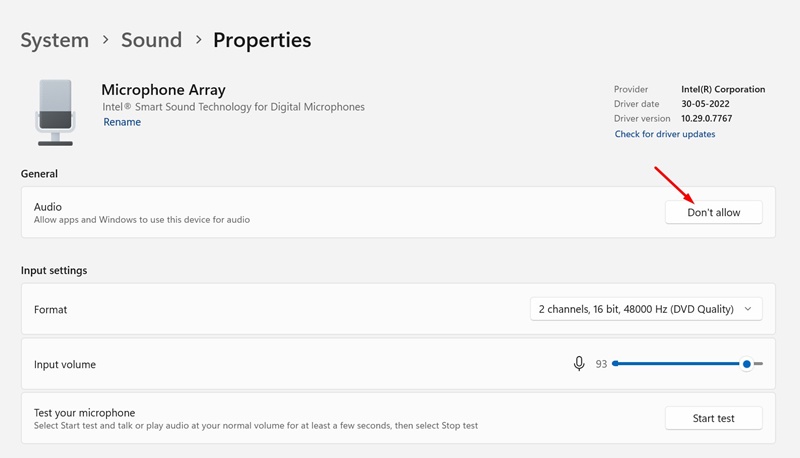
That’s it! This is how you can enable or disable Microphone in Windows 11 using the Sound Settings.
So, this guide is all about how to enable or disable Microphone in Windows 11. Let us know if you need more help enabling or disabling the Microphone access on your computer.
[ad_2]
Source link
